
Viking Rise bot setup
This guide takes you from a fresh install to a Viking Rise bot running its first automated cycle. It should take about fifteen minutes, most of which is LDPlayer downloading things.
What you need first
- Windows. BotDaddy is Windows-only, because LDPlayer is.
- LDPlayer 9/14 with Viking Rise installed through BotDaddy.
- Hardware virtualization enabled in your BIOS/UEFI. Without it LDPlayer runs at a crawl or refuses to start.
- A BotDaddy licence key, which arrives by email after checkout — or a free 7-day trial key, which you can ask for on our Discord if you would rather try it first.
One LDPlayer instance per account is the model. How many instances you can keep is a question of disk space; how many can run at once is a separate question, covered below.
Installing BotDaddy
Run the installer and launch the app. It opens on the Overview dashboard; before anything else, go to License in the sidebar.
Paste your licence key and activate. The key binds to this machine, which the License page shows alongside your renewal date — so activating on a second computer needs the key freeing from the first. If you've lost the key, it's on your account page, masked, with a regeneration option.
Regenerating replaces the old key. The app on any machine still holding it will stop validating, so only regenerate if you actually can't recover the original.
Connecting LDPlayer
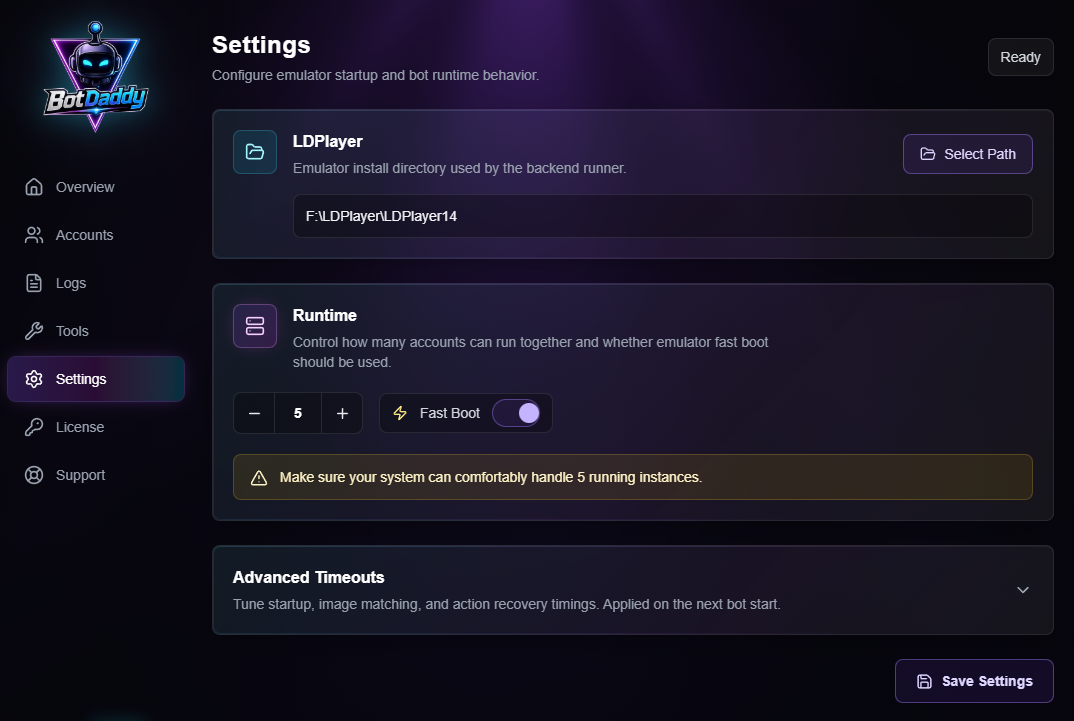
Open Settings and set the LDPlayer path. This is the folder
containing ldconsole.exe — typically C:\LDPlayer\LDPlayer9 or C:\LDPlayer\LDPlayer14. In the
desktop app you can browse for it directly.
BotDaddy talks to LDPlayer through ldconsole and ADB rather than
clicking on your desktop, so the emulator windows don't need to be
visible or focused. You can keep working while it runs.
While you're in Settings, the Runtime control sets how many accounts run at the same time. This is concurrency, not how many accounts you can have — you can add as many accounts and instances as your disk holds, and this decides how many of them are awake at once.
It's the setting that matters most for stability, and there is no correct number we can give you: it depends on your CPU, RAM, disk speed and what else the machine is doing. Find it by testing. Start low, watch a full cycle complete, raise it a step, watch again. When boots start timing out or cycles get noticeably slower, you've gone one step past your limit — come back down.
Every concurrent account is a full Android Virtual Machine, so the usual failure mode for a new setup is running more at once than your PC can actually boot. Fewer accounts that finish reliably beats more that thrash.
The Advanced Timeout Settings on that page (instance start, game process, game ready) exist for slow machines. Leave them alone until something times out repeatedly.
Creating LDPlayer instances
Each account needs its own LDPlayer instance, and instances are created in LDMultiPlayer, LDPlayer's own multi-instance manager — not in BotDaddy.
You can open it any of three ways:
- Search for LDMultiPlayer in the Windows Start menu.
- Use the LDMultiPlayer desktop shortcut, created when you installed LDPlayer.
- Click Multi-player on the right-hand toolbar of a running LDPlayer window.
The first two don't need LDPlayer open, which makes them the easier route when you're setting up a batch of instances. Below is an image of LDMultiplayer that comes with LDPlayer14, and it looks similar to the one that comes with LDPlayer9.
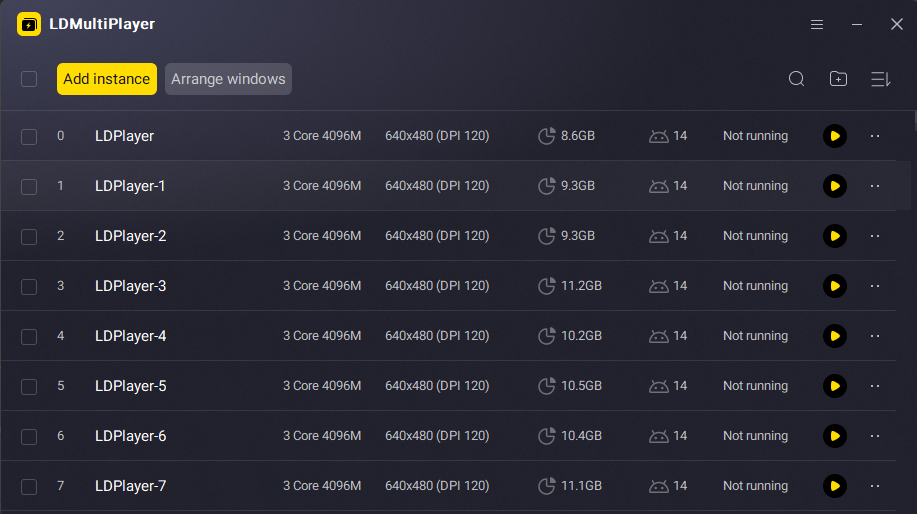
Two ways to add one:
- Add Instance creates a blank instance with no apps installed. You then install Viking Rise on it and log in once.
- Clone Instance copies an existing instance, including everything installed on it. We do not recommend it as it can carry over the machine fingerprint and may cause login issues.
LDMultiPlayer also has batch controls for adding, cloning and starting several instances at once, which is worth knowing about if you're building a farm rather than adding one account.
Two things to expect:
- Instance management is unavailable while an instance is running. Settings, Remove and Backup/Restore are all greyed out until you close it. Close instances before reorganising them.
- How many instances you can keep is a disk-space question. Each one is a full Android Virtual Machine with its own copy of the game. Whether they can all run at once is the Runtime concurrency question from earlier, and the two limits are unrelated.
Give each instance a name you'll recognise in BotDaddy's account list. Renaming later is safe — accounts bind to the instance itself, not its name — but it saves you matching numbers.
Adding your first account
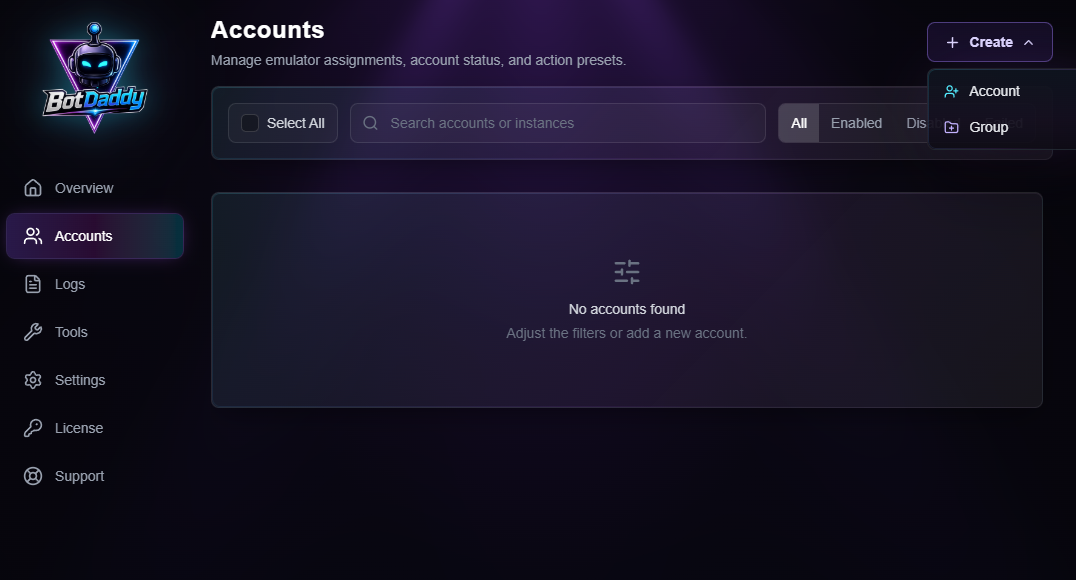
On the Accounts page, add an account and bind it to an LDPlayer instance. The binding is by instance, not by name, so renaming an instance in LDPlayer later won't break it.
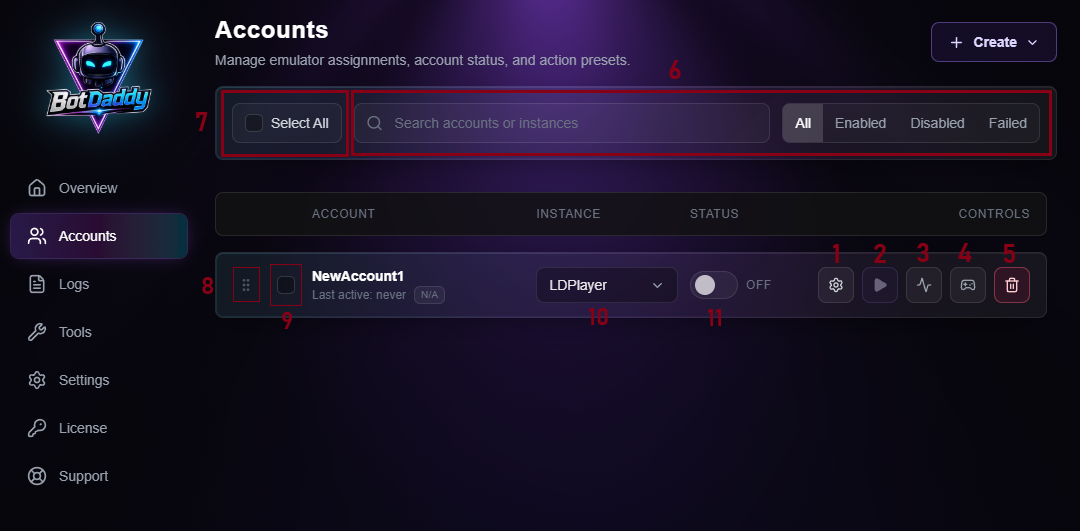
1. Action Settings Button - Opens the Action setings page where you can set what actions you want to run on the account.
2. Start Button - Starts the run cycle from that account.
3. Configure Button - Configures the instance assigned to the account, MUST DO to make sure bot works properly.
4. Game Install/Update Button - Installs or updates the game on that instance. Do not install the game manually, often times users install the wrong version that isn't supported by the bot and run into errors.
5. Delete Account - Deletes the account.
6. Account Filter options - A search bar to find accounts faster if you have a large number of them, and also quick filters to show only accounts that are enabled, disabled, or have failed the current run.
7. Select All - Selects all accounts to perform actions like Configure, install/update game, apply action settings etc in bulk.
8. Account Reorder - Use this button to arrange accounts on your list. Simply click and hold on the button, and drag it up and down to move the account to the desired position on the list. The bot cycles through the accounts in this list in the order you have arranged them.
9. Account Selector - Selects individual accounts to perform supported actions on them.
10. LDPlayer Instance Picker - Shows a list of LDPlayer instances to choose from for the account.
11. Toggle Button - Enables/Disables the account.
Once you're done creating the accounts and assigning them an instance, pick the actions that account should run. Each action has its own config, and most have sensible defaults — gathering, dailies and training are the usual starting three. Actions run in the order you arrange them, so put the time-sensitive ones first.
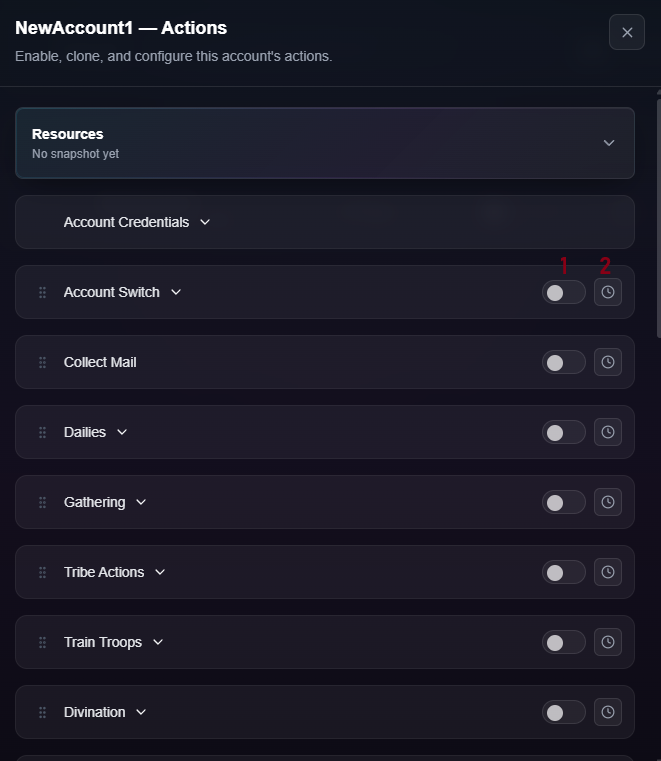
1. Toggle Switch - Enables/Disables the action for the account. 2. Action Scheduler - Opens the action scheduler for the action. You can set a time window and days of the week to run the action.
Each action can carry it's own schedule, if you want it gated to certain days or a time window. Leave scheduling off for your first run; it's one more thing to be wrong while you're still confirming the basics work.
Your first run
Hit start. The bot boots the instance, launches the game, waits for the city view, and begins working through the actions you enabled.
Watch the first cycle rather than walking away. The activity feed narrates
what's happening in plain language, and the per-account logs in
Documents\BotDaddy carry the detail if something needs chasing down.
A healthy first run looks like: instance starts, game launches, the account reaches its city, and actions begin completing one after another. A restart or two along the way isn't a problem — the bot restarts an instance rather than pushing through a state it doesn't recognise, and picks up where it left off.
When something doesn't work
LDPlayer won't start at all. Almost always Hyper-V or another hypervisor holding the virtualization layer. The in-app virtualization assistant detects and walks you through this.
The bot can't find your instance. LDPlayer reassigns indices after some rebuilds. Restarting the bot re-reads the current list and fixes it.
Everything is slow, or instances time out. Too many accounts running at once for this machine. Lower the Runtime concurrency in Settings by a step and see whether cycles complete cleanly again.
Actions fail on one account but not others. Usually that account's game state rather than the bot: an unfinished tutorial step, a modal the game won't dismiss, or a building the action needs that isn't built yet.
Next steps
- Tune gathering so every march slot stays busy — see Automating gathering.
- Scale past one account — see Running multiple accounts.
- Anything unexplained: the support page usually gets a reply within a few hours.