
The BotDaddy Accounts screen
This is where you'll spend nearly all your setup time: creating accounts, binding each to an emulator, choosing what it does, and running the fleet.
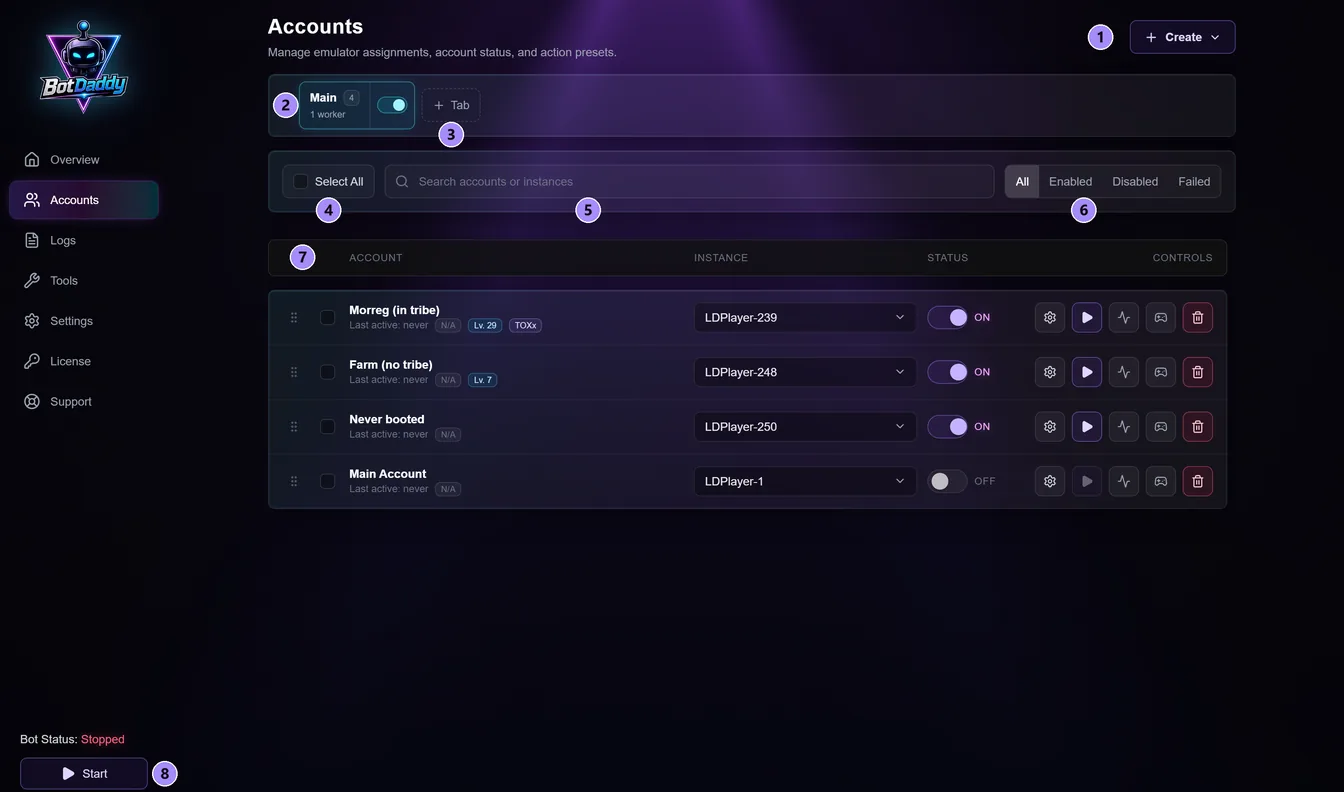
- Create — adds an account, several at once, or a group.
- Tab strip — each tab is a saved partition of your account list with its own queue and share of the workers. There's always a Main tab.
- + Tab — adds a tab.
- Select All — selects every account in the tab you're looking at, which turns on the bulk toolbar.
- Search — filters by account or instance name, within the current tab only.
- Status filters — All, Enabled, Disabled, Failed. Also scoped to the current tab.
- The account list — one row per account, in the order the bot runs them. Drag to reorder.
- Start — starts the bot. The status above it says what the bot is doing.
One account row

- Drag handle — the list order is the run order, so this is how you set priority.
- Row checkbox — selects this account for a bulk action.
- Name — click to rename. Underneath sits the last-active time, the installed game version, the Chief's Hall level and the tribe tag, as the bot last read them.
- Instance picker — which LDPlayer instance this account uses. The binding is to the instance itself, so renaming it in LDPlayer later breaks nothing.
- Enable toggle — ON means the account runs. OFF keeps it and everything configured on it, but leaves it out of every run.
- Action Settings — opens the action list for this account.
- Start from this account — starts the bot beginning with this one.
- Configure / Check Instance — writes the recommended settings into that LDPlayer instance. Do this once per instance before running it.
- Update / Install Game — installs or updates Viking Rise on that instance. Use this rather than installing by hand — a manually installed build is often the wrong one and produces errors that look like bot faults.
- Delete Account — removes the account. It does not delete the emulator instance.
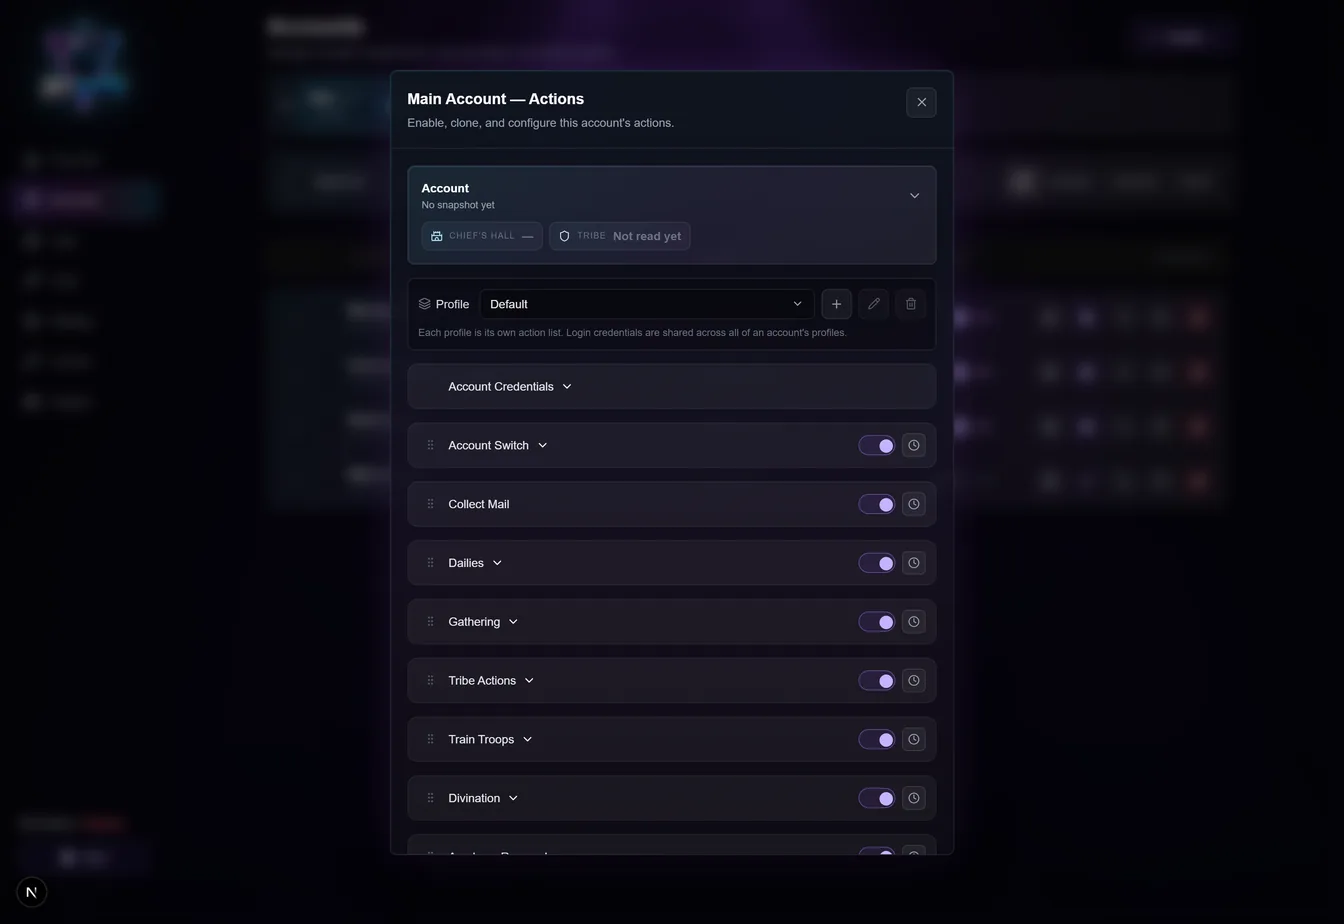
Inside that panel the order is the order the bot works through, so drag the time-sensitive ones up. One placement genuinely matters: Account Switch belongs at the very top, because it decides which character everything below it runs as.
Every action can be added more than once
Right-click any action and choose Clone. You get a second copy carrying the same settings, at the bottom of the list, labelled #2 — and from then on the two are independent. Edit one and the other doesn't move.
That's what turns a fixed list of actions into as many setups as you want:
- Gathering twice, one copy on wood and one on stone, each with its own time window.
- Auto Rally twice, the second scheduled for the evening, so the account re-arms once the day's joins are spent.
- Dragon Cave, Staging Post, Skill Shop and Repair Wall several times a day — each run takes what's available at that moment and the game restocks.
- Account Switch twice, so one account works two characters in a single cycle.
Copies run in list order like everything else, so drag them where you want them. Remove clone on the same menu takes one away; the original stays and is switched off rather than removed. You can have up to 200 copies of any one action.
The only action you can't copy is Credentials — one account has one login, so there's nothing to have two of.
Creating accounts
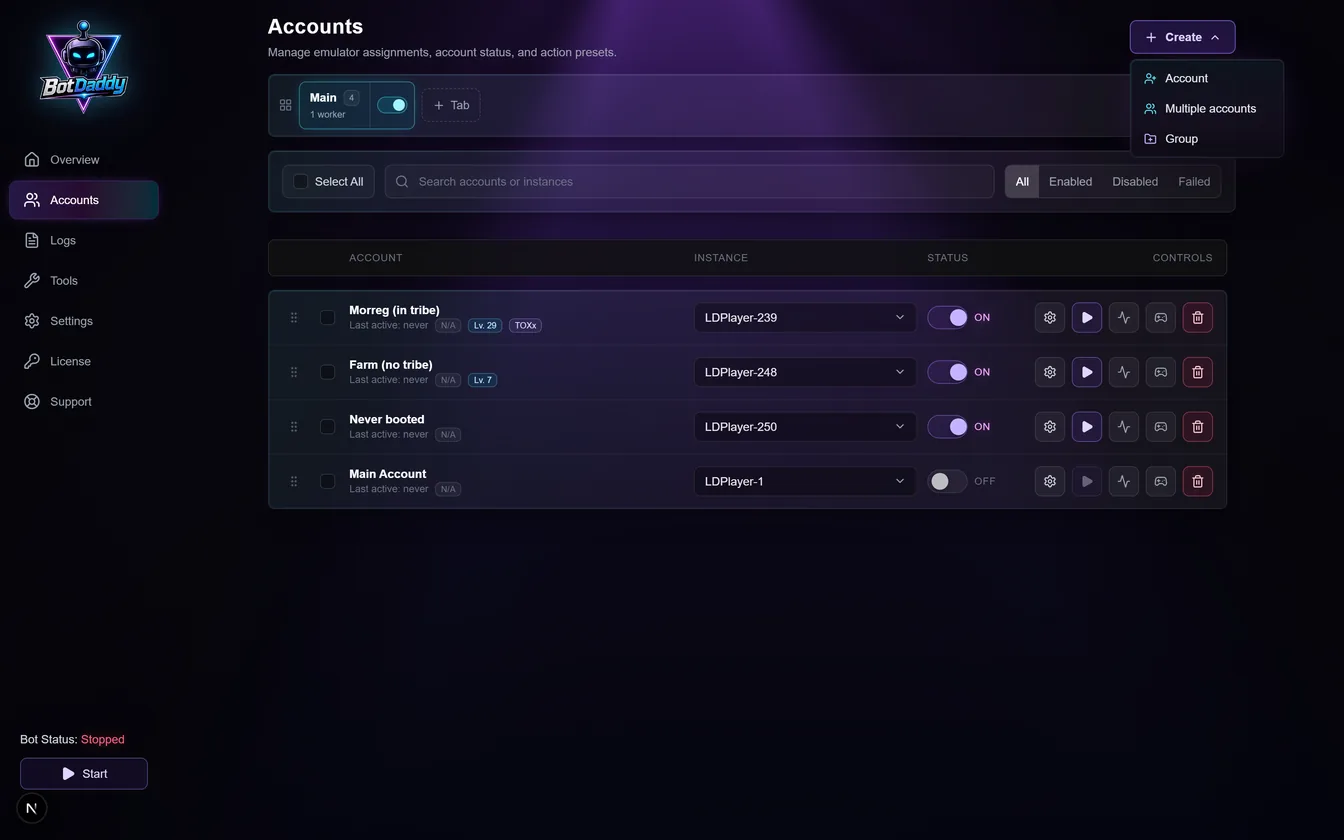
- Account — one account, bound to the next free instance.
- Multiple accounts — a batch in one go, each taking the next free instance. Accounts beyond the number of free instances are created unbound and show "Select Instance".
- Group — a folder to organise accounts into. See account groups.
A new account lands in whichever tab you're looking at, starts disabled, and has every action switched off except Credentials.
Working on several accounts at once
Tick some rows — or use Select All — and a toolbar appears above the list: Apply to selected (copying actions), Send to…, Update/Install Game, Configure, Enable, Disable and Delete.
Troubleshooting
An account shows "Select Instance". It isn't bound to an emulator yet. Pick one from the dropdown.
I renamed an instance in LDPlayer. Nothing breaks — accounts bind to the instance itself, not its name. The name shown here updates when the app next reads the list.
LDPlayer renumbered my instances after a rebuild. Restarting the app re-reads the current list and fixes the bindings.
I have two accounts on one emulator. That's the normal way to run two characters. They take turns on that instance — one runs, the other waits, then they swap. Use Account Switch to change character between them.
I searched while rows were selected. The selection is kept but the list is filtered. Bulk actions apply to what's selected, not what's visible — check the count on the toolbar before deleting.
I switched tabs with rows selected. The selection is cleared, so you can't act on rows you can no longer see.
I didn't press Configure on a new instance. It may run with settings the bot doesn't expect. Configure once per instance before its first run.